
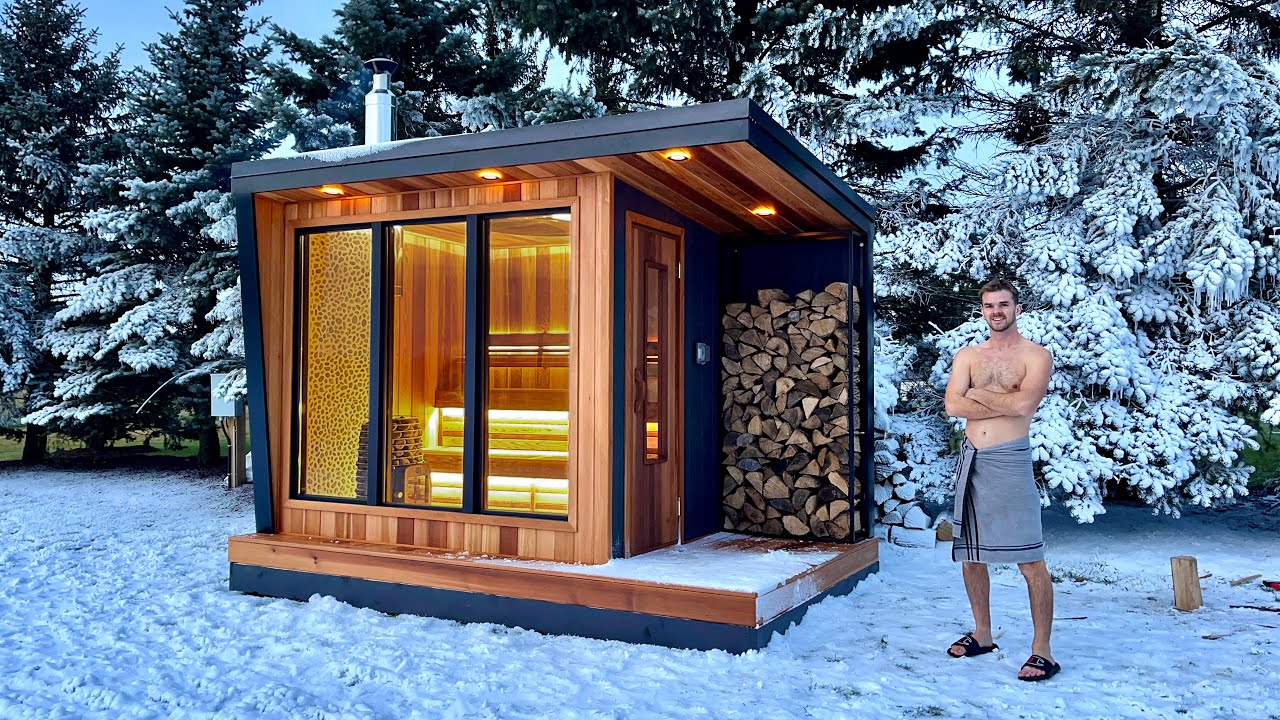
Visualizing your build
Building an outdoor sauna is more than a weekend project; it's a way to reclaim your backyard for something better than just mowing the lawn. While the cost savings over a pre-built kit are great, the real win is getting the heat and layout exactly how you want it. We're looking at how to combine traditional builds with the remote sensors and automation available in 2026.
Building a sauna is a substantial project, yes, but it’s absolutely achievable for a dedicated DIY enthusiast. Forget the idea that this is only for professional contractors. We'll break down each step, providing the information you need to make informed decisions and avoid common pitfalls. The core of the sauna experience, as anyone familiar with Finnish traditions will tell you, is about simplicity and connection with nature. We’ll draw on that heritage as we explore modern construction techniques.
This guide aims to be comprehensive. We’ll cover everything from navigating building codes and permits to selecting the right heater and integrating smart controls. Expect a detailed look at foundation options, framing techniques, interior finishing, and, crucially, safety considerations. By the end, you’ll have a clear roadmap for building the sauna of your dreams, a space tailored to your needs and preferences.
Planning and permits
Before you even think about laying a foundation, you need to address the less glamorous but absolutely essential task of planning and permits. Ignoring local building codes can result in hefty fines, forced demolition, or a whole lot of frustrating rework. Trust me, it’s far better to do things right from the start. Begin by contacting your local building department to understand the specific requirements in your area.
Zoning regulations are a primary concern. You’ll need to determine if a sauna is permitted on your property and what the setback requirements are – how far it needs to be from property lines, structures, and easements. Don’t overlook potential restrictions imposed by your Homeowners Association (HOA). They may have rules regarding size, location, and even exterior finishes. Get everything in writing.
Don't skip the electrician. You're putting high-voltage equipment inside a wooden box that gets wet; it's not the place to DIY your wiring. You also need to account for snow loads on the roof and airflow. If you're using a wood stove, ventilation isn't just for comfort—it's so you don't wake up with carbon monoxide poisoning. Pick a spot with natural drainage so your foundation doesn't rot out in three years.
- Check local zoning regulations.
- Determine setback requirements.
- Review HOA restrictions (if applicable).
- Obtain necessary building permits.
- Ensure electrical work is done by a qualified electrician.
- Plan for proper ventilation.
Foundation and framing
The foundation is the base of your sauna, and choosing the right one depends on your budget, climate, and soil conditions. A concrete slab is the most durable option, but also the most expensive and labor-intensive. A gravel base is a more affordable and easier-to-install alternative, particularly suitable for well-drained soil. Pier foundations, using concrete piers sunk into the ground, are a good choice for uneven terrain or areas prone to flooding.
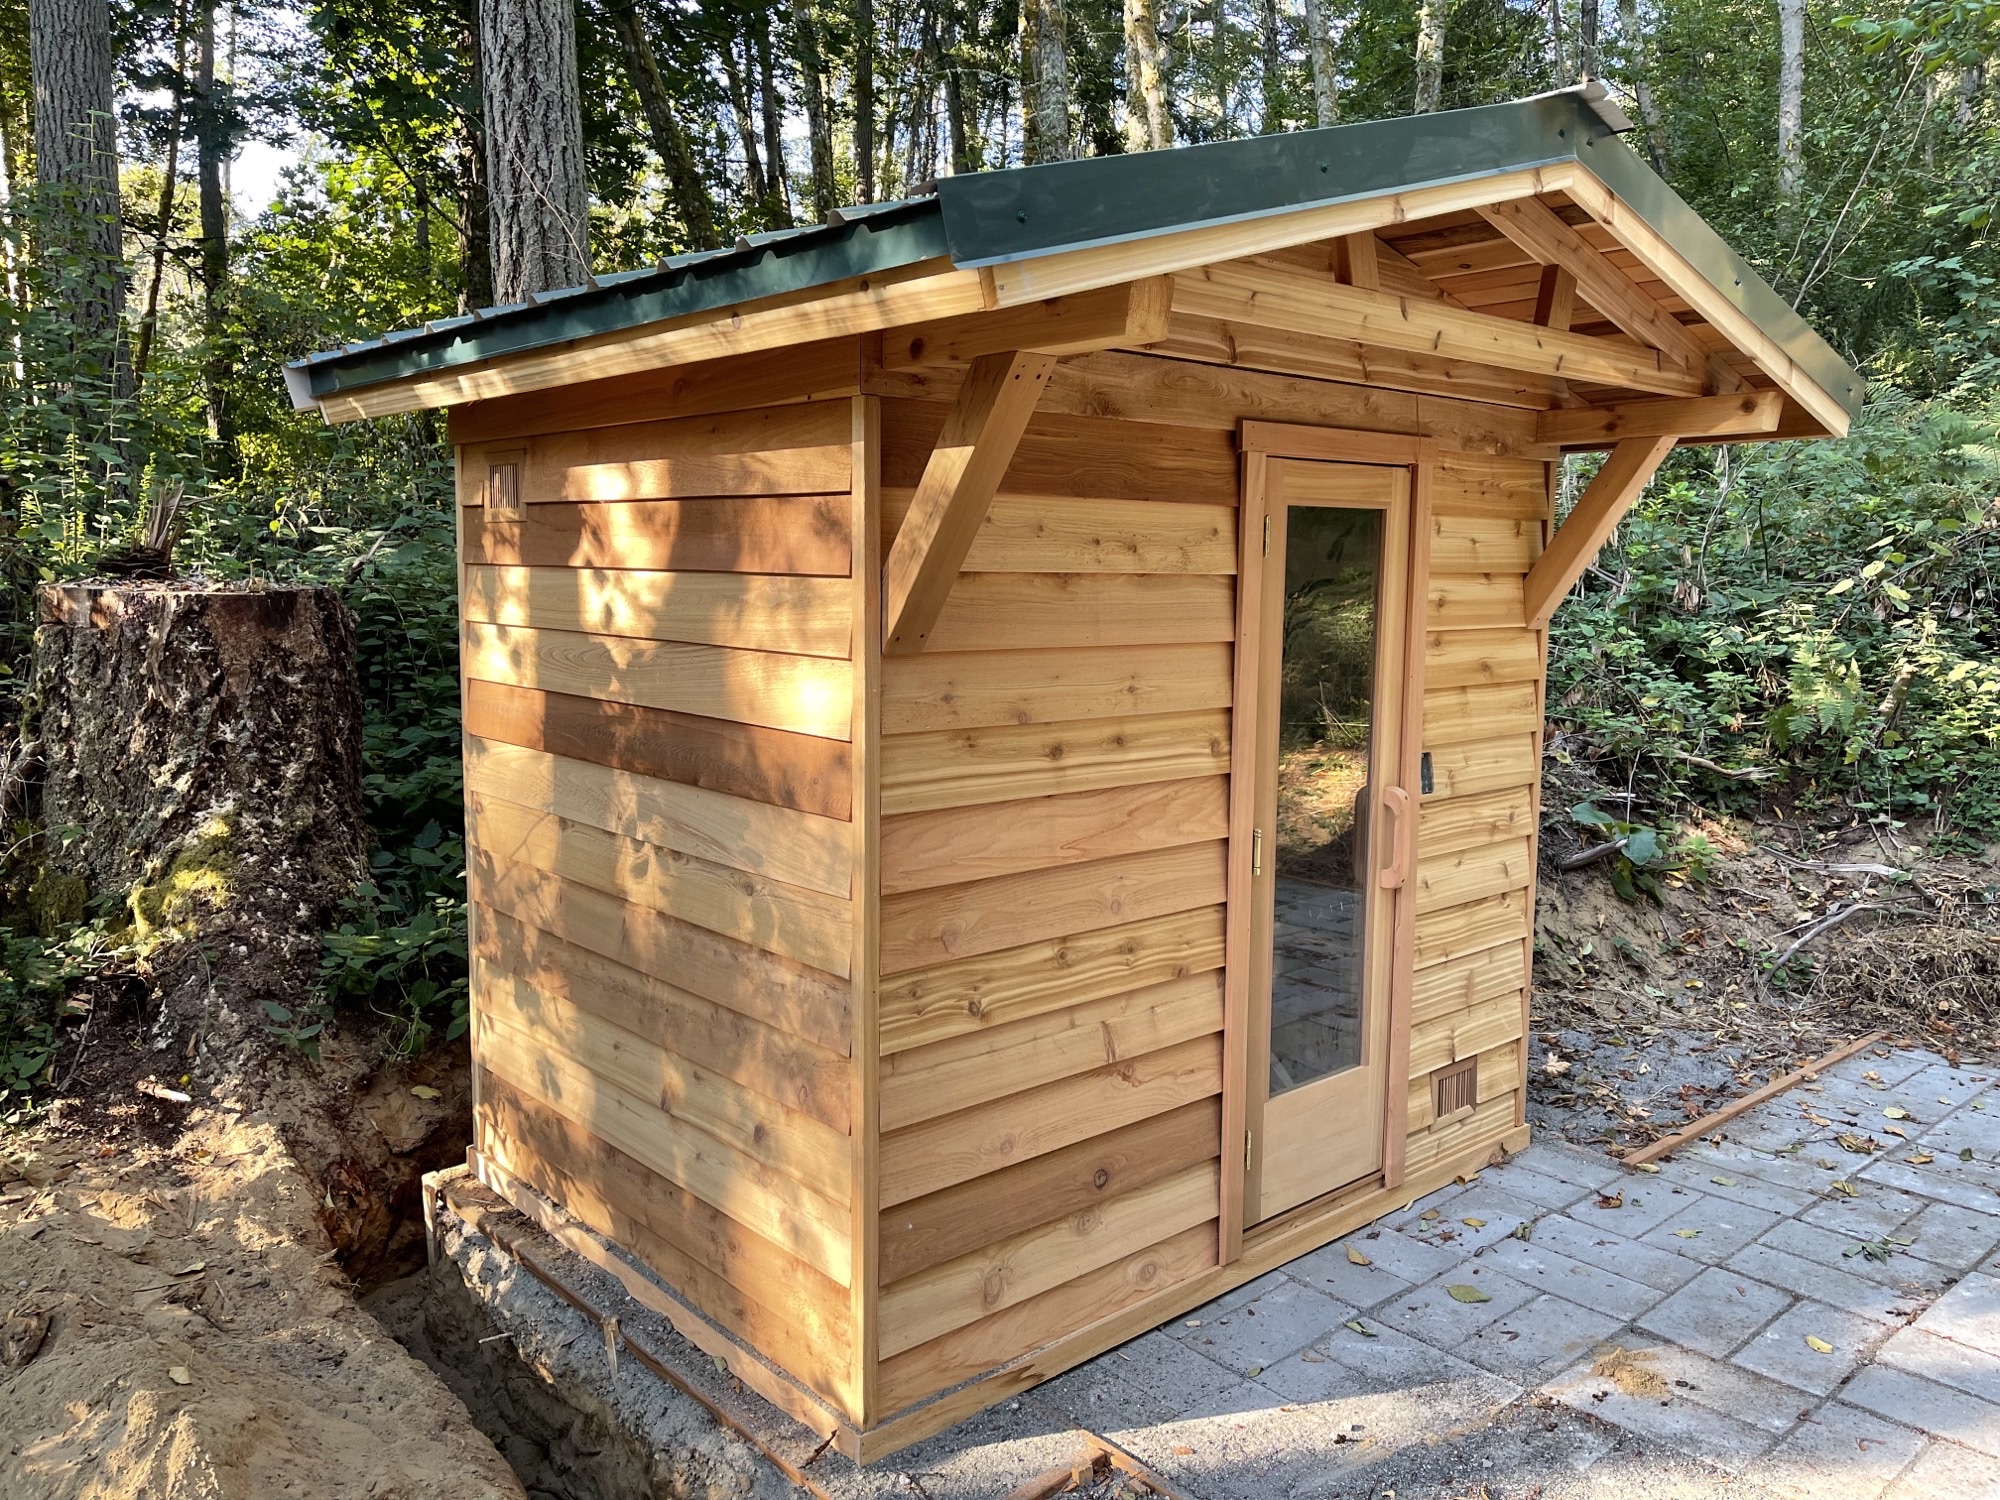
When it comes to framing, cedar, redwood, and spruce are popular choices due to their natural resistance to rot and insects. Cedar is generally considered the best option, but it’s also the most expensive. Spruce is the most affordable, but it requires more maintenance. Framing techniques should adhere to standard construction practices, ensuring a structurally sound building. Pay close attention to load-bearing walls and proper bracing.
The roof is a critical element. It needs to be strong enough to withstand snow loads, wind, and rain. Consider a pitched roof to facilitate water runoff. A common framing mistake is underestimating the weight of snow, especially in colder climates. Overbuilding the roof structure is always preferable to risking a collapse. Using quality roofing materials is also essential for long-term durability.
- A concrete slab is the most durable but requires the most digging and mixing.
- Gravel Base: Affordable, easy to install, suitable for well-drained soil.
- Pier Foundation: Good for uneven terrain, flood-prone areas.
Wood, electric, or infrared heaters
The heart of any sauna is the heater. You have three main choices: wood-burning stoves, electric heaters, and infrared heaters. Wood-burning stoves offer a traditional sauna experience, with a dry heat and the aroma of burning wood. They require a chimney and careful attention to fire safety. Electric heaters are more convenient and easier to install, but they may not provide the same intense heat. Infrared heaters heat the body directly, rather than the air, offering a different type of sauna experience.
BTU requirements depend on the size of your sauna. A general rule of thumb is 30-50 BTU per cubic foot. Electric heaters typically range from 6kW to 9kW, while wood-burning stoves can vary widely in output. Efficiency is also a factor. Modern electric heaters are generally more efficient than older models. Cost is a significant consideration, with wood-burning stoves typically being more expensive to purchase and install than electric heaters.
Proper ventilation is absolutely crucial when using a wood-burning stove. Ensure the chimney is properly sized and installed to prevent carbon monoxide buildup. Thesaunaheater.com is a great resource for comparing different heater options and specifications. Remember to factor in the cost of installation, including electrical work or chimney construction.
- Wood-burning stove: Traditional, dry heat, requires chimney.
- Electric heater: Convenient, easy to install, less intense heat.
- Infrared heater: Direct body heating, different sauna experience.
Sauna Heater Comparison
| Heater Type | Cost | Installation Difficulty | Heating Speed | Maintenance | Environmental Impact |
|---|---|---|---|---|---|
| Wood-Burning | Higher | Hard | Moderate | High | Moderate to High (depending on wood source) |
| Electric | Moderate | Medium | Fast | Low | Moderate (dependent on electricity source) |
| Infrared | Moderate to High | Easy | Moderate | Very Low | Low |
| Gas (Propane/Natural Gas) | Moderate | Medium to Hard | Fast | Medium | Moderate |
| Wood-Fired with Water Jacket | Higher | Hard | Slow to Moderate | High | Moderate to High (depending on wood source) |
| Combined Wood & Electric | High | Hard | Fast | Medium to High | Moderate to High (wood component) |
Qualitative comparison based on the article research brief. Confirm current product details in the official docs before making implementation choices.
Interior Finishing: Wood, Benches, & More
The interior of your sauna is where you’ll spend the most time, so choosing the right materials is essential. Cedar is the most popular choice for interior paneling due to its aroma, durability, and resistance to moisture. Hemlock and pine are more affordable alternatives, but they may require more maintenance. Avoid using treated lumber, as it can release harmful chemicals when heated.
Bench construction is critical for comfort. Benches should be built at different heights to allow for varying heat levels. The top bench will be the hottest, while the lower benches will be cooler. Depth and angle are also important – a deeper bench provides more seating space, while a slight angle allows water to drain away. Use smooth, rounded edges to prevent splinters.
Flooring options include wood, tile, or a simple gravel base. A sloped floor is essential for drainage, preventing water from pooling and causing rot. Using heat-resistant materials is crucial – avoid anything that could melt or off-gas when exposed to high temperatures. Create a relaxing atmosphere with soft lighting and natural elements.
Smart sauna tech for 2026
In 2026, the possibilities for smart sauna integration are expanding rapidly. Smart thermostats allow you to remotely control the temperature of your sauna, preheating it before you arrive. Smartphone apps provide convenient control over all aspects of your sauna, from lighting to sound. Automated lighting systems can create a relaxing ambiance, while integrated sound systems allow you to enjoy music or podcasts.
Integration with popular smart home platforms like Google Home, Amazon Alexa, and Apple HomeKit is becoming increasingly common. This allows you to control your sauna with voice commands or through your existing smart home ecosystem. Sensors can monitor temperature and humidity, providing valuable data and ensuring optimal conditions. Some systems can even adjust the heat automatically based on your preferences.
While specific SDKs and APIs are constantly evolving, the general concept involves connecting your sauna heater and control systems to a smart home hub. This hub then communicates with your smartphone or voice assistant. The level of integration will depend on the specific products you choose, but the potential for creating a truly personalized and automated sauna experience is significant.
- Smart thermostats let you kick off the pre-heat from your phone while you're still finishing dinner.
- Smartphone Apps: Comprehensive sauna control.
- Automated Lighting: Relaxing ambiance.
- Integrated Sound Systems: Music and podcasts.
- Smart Home Platform Integration: Google Home, Amazon Alexa, Apple HomeKit.
Sauna Safety: Essential Precautions
Sauna use can be incredibly beneficial, but it’s essential to prioritize safety. Proper hydration is crucial – drink plenty of water before, during, and after your sauna session. Limit your time in the sauna to 15-20 minutes per session, especially when you’re first starting out. Avoid consuming alcohol before or during sauna use, as it can impair your judgment and increase the risk of dehydration.
Recognize the signs of overheating, such as dizziness, nausea, and headache. If you experience any of these symptoms, leave the sauna immediately. Fire safety is paramount. Install smoke detectors and keep a fire extinguisher readily available. Ensure your wood-burning stove is properly installed and maintained.
It’s always a good idea to consult with a medical professional before using a sauna, especially if you have any pre-existing health conditions, such as heart disease, high blood pressure, or diabetes. Be aware of the risks and take the necessary precautions to ensure a safe and enjoyable sauna experience.

No comments yet. Be the first to share your thoughts!