
Dream Sauna: Visualizing Your Build
There's something deeply satisfying about sinking into the heat of a sauna, especially one you've built with your own hands. It's a connection to tradition, a boost for your well-being, and a stunning addition to your backyard. Building your own outdoor sauna isn’t just about saving money – though that's a significant benefit – it's about crafting a space tailored to your exact preferences, a true reflection of your relaxation style.
The appeal is clear: a DIY sauna can cost significantly less than a pre-fabricated model, often saving several thousand dollars. Beyond the financial advantages, you have complete control over the design, size, wood type, and heater selection. This level of customization is hard to achieve with commercially available options. Plus, the sense of accomplishment after completing such a project is incredibly rewarding.
While it's definitely a project requiring planning and effort, building a sauna is within reach for many homeowners with basic carpentry skills. This guide will focus on traditional, wood-fired outdoor saunas, as they remain the most popular choice for DIY builders. We’ll cover everything from initial planning and permitting to material selection, construction techniques, and cost breakdowns, setting you up for success.
Permitting and Local Regulations
Before you even think about lumber or heaters, you must check your local building codes and regulations. This is the least glamorous part of the process, but it's absolutely crucial. Ignoring these rules can lead to hefty fines, forced demolition, or endless headaches down the line. Don't assume your neighbor’s sauna build went unchecked – regulations vary dramatically from place to place.
Start by contacting your local building department. Inquire about permits required for structures in your backyard, specifically saunas. Be prepared to discuss setbacks from property lines, height restrictions, and any potential restrictions on wood-burning appliances. Some areas may have specific requirements for fire safety, such as distance from flammable materials or the installation of a fire-resistant roof.
Even if your municipality doesn’t explicitly require a permit for a small structure, it's wise to check with your Homeowners Association (HOA), if applicable. HOAs often have their own rules regarding exterior structures and landscaping. Don't forget about electrical requirements, even for a wood-fired sauna. You may need a permit for any electrical work, such as installing lights or an outlet. Failing to comply with local regulations can result in fines ranging from a few hundred to several thousand dollars, depending on the severity of the violation.
Foundation First: Site Prep & Base
A solid, level foundation is the bedrock of any successful sauna build. It’s tempting to skip this step, but a poorly prepared base will lead to structural problems and a shortened lifespan for your sauna. You have several options: a gravel pad, a concrete slab, or a pier foundation. Each has its own pros and cons regarding cost, drainage, stability, and ease of construction.
A gravel pad is the most affordable and simplest option, suitable for smaller saunas and well-drained sites. It involves excavating the area, laying down landscape fabric, and then filling it with compacted gravel. A concrete slab provides the most stable and durable foundation, but it's also the most expensive and labor-intensive. Pier foundations, using concrete footings and posts, are a good compromise, offering stability and good drainage.
Regardless of the foundation type, proper site preparation is essential. Level the ground, remove vegetation, and ensure good drainage. Water accumulation under the sauna will lead to rot and structural damage. Consider snow load in colder climates – a deeper foundation or reinforced structure may be necessary. BrennanC3’s Instructables guide on wood fired sauna construction details a solid gravel pad approach, emphasizing the importance of compaction and a level surface for stability.
Material Breakdown: 2026 Cost Estimates
Let's get down to brass tacks: how much will this actually cost? As of late 2026, material prices are still fluctuating, but here’s a detailed breakdown to help you budget. These are estimates, and prices will vary based on your location, lumber quality, and supplier. We’ll look at costs for an 8x8 sauna, a common starting size, and then extrapolate for larger builds.
Lumber: This will be your biggest expense. Expect to pay around $3-$7 per board foot for framing lumber (2x4s, 2x6s). Interior paneling, particularly cedar, ranges from $6-$12 per board foot. A rough estimate for lumber alone for an 8x8 sauna: $2,500 - $5,000. Roofing: Asphalt shingles are the most affordable option ($1.50 - $3 per square foot), while metal roofing is more durable but pricier ($4 - $10 per square foot). Estimate $500 - $1,500 for roofing.
Insulation: Mineral wool is a popular choice for saunas, costing around $1-$3 per square foot. $300 - $800. Sauna Heater: Wood-fired heaters range from $800 to $3,000, depending on size and features. Chimney: A stainless steel chimney is essential for safety. Expect to spend $300 - $800. Door & Windows: A sauna door ($300-$600) and a small window ($100-$300) are necessary. Benches: Cedar benches can be built yourself for around $200 - $500 in materials.
Rocks: Sauna rocks ($100-$200) are often overlooked. Fasteners: Stainless steel screws and nails are crucial ($100-$200). Other: Don’t forget about vapor barrier ($100-$200), sealant, and miscellaneous supplies ($200-$500). For an 8x8 sauna, a realistic total cost range is $5,000 - $10,000. A 10x10 sauna will likely cost between $7,000 and $14,000. Choosing spruce over cedar for paneling can save you a significant amount of money, but cedar offers superior durability and resistance to rot.
Here’s a quick table summarizing the estimates:
| Material | 8x8 Sauna Estimate | 10x10 Sauna Estimate |
|-----------------|---------------------|----------------------|
| Lumber | $2,500 - $5,000 | $3,500 - $7,000 |
| Roofing | $500 - $1,500 | $700 - $2,000 |
| Insulation | $300 - $800 | $400 - $1,200 |
| Heater | $800 - $3,000 | $800 - $3,000 |
| Chimney | $300 - $800 | $300 - $800 |
| Total (approx.) | $5,000 - $10,000 | $7,000 - $14,000 |
Wood Type Comparison for Sauna Construction
| Wood Type | Cost (per board foot) | Durability | Aroma | Resistance to Rot | Workability |
|---|---|---|---|---|---|
| Cedar | Moderate to High | High | Distinct, pleasant | High | Moderate |
| Spruce | Low to Moderate | Moderate | Subtle, resinous | Moderate | High |
| Pine | Low | Moderate | Noticeable, pine scent | Low to Moderate | High |
| Redwood | High | Very High | Faint, sweet | Very High | Moderate |
Illustrative comparison based on the article research brief. Verify current pricing, limits, and product details in the official docs before relying on it.
Framing and Structure: Building the Shell
With your materials gathered, it’s time to build the sauna’s skeleton. The framing process is similar to building a small shed. Use 2x4 construction-grade spruce studs, as recommended by Saunafin's rough-in guide. Ensure all framing members are pressure-treated where they contact the foundation to prevent rot. Accurate measurements and square corners are absolutely critical for a structurally sound build.
Start by building the floor frame, ensuring it’s level and securely attached to the foundation. Then, construct the wall frames, including openings for the door and windows. Pay close attention to the roof pitch – a steeper pitch will shed snow more effectively. The Elsa Rhae & Barron YouTube video offers excellent visual guidance on framing techniques, showcasing a sturdy and well-built sauna structure.
When installing windows and doors, ensure a tight seal to prevent heat loss. Use quality flashing and sealant to protect against moisture intrusion. Double-check all connections with screws or nails, and reinforce corners with bracing. Remember to prioritize safety – wear appropriate personal protective equipment, such as safety glasses and gloves, and use power tools responsibly.
Interior Finish: Paneling, Benches & Heater
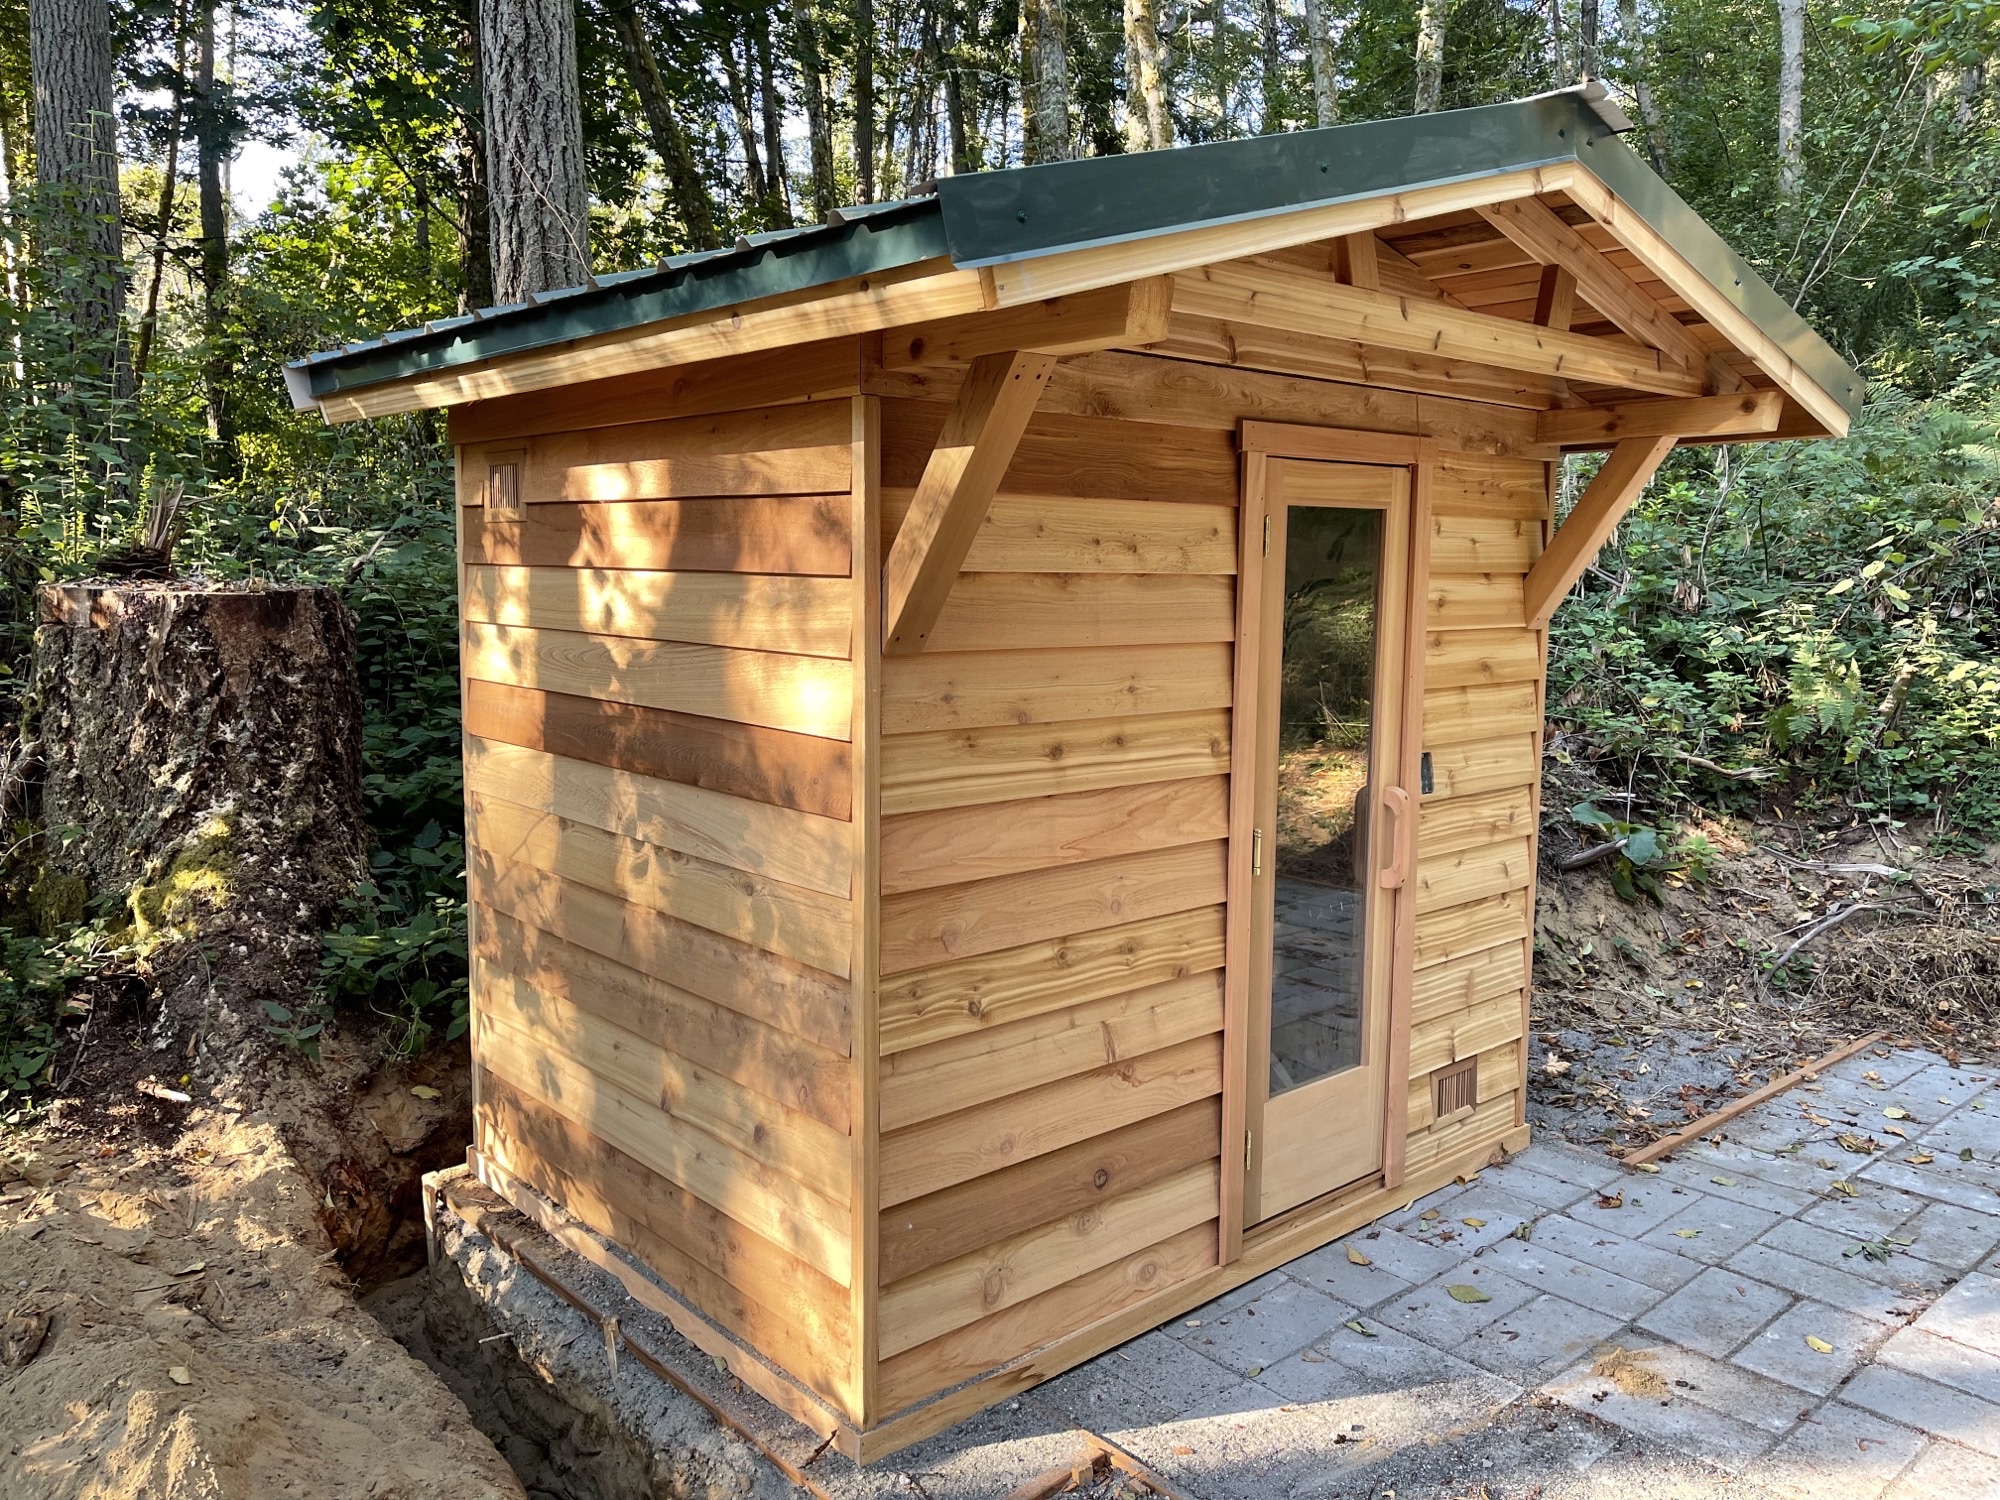
Once the shell is complete, it’s time to transform the interior into a relaxing sauna haven. Installing the wood paneling is a satisfying step, and cedar is the wood of choice for its aroma, durability, and resistance to moisture. Attach the paneling to the framing, leaving a small gap for expansion and contraction. Build the benches using cedar or another heat-resistant wood. Consider a two-tier bench configuration for varying heat levels.
Proper installation of the sauna heater is paramount for safety. Follow the manufacturer’s instructions carefully, ensuring adequate clearances from combustible materials. The chimney must be installed correctly to vent exhaust fumes safely. Stack the sauna rocks, choosing a variety of sizes to maximize heat retention. Use only sauna-grade rocks – other types can explode when heated.
Ergonomic considerations are important when designing the benches. A slight angle and rounded edges will enhance comfort. Ensure there’s enough space between the benches and the heater to prevent burns. A properly installed chimney is critical for safe operation. It should extend above the roofline and be equipped with a spark arrestor.
Insulation & Vapor Barrier: Maximizing Heat Retention
Don’t underestimate the importance of insulation and a vapor barrier. These components work together to maximize heat retention and prevent moisture damage, both crucial for a long-lasting and efficient sauna. Without proper insulation, your heater will work overtime, and you’ll struggle to reach and maintain a comfortable temperature.
Mineral wool is a popular insulation choice for saunas due to its high heat resistance and non-combustible properties. Fiberglass insulation is another option, but it’s less resistant to heat. Spray foam insulation offers excellent insulation and moisture barrier properties, but it’s more expensive. Install the insulation between the framing studs, ensuring a snug fit. A vapor barrier, typically a polyethylene film, should be installed on the warm side of the insulation to prevent moisture from penetrating the walls.
Seal all gaps and cracks with sealant to minimize heat loss. Pay particular attention to areas around windows, doors, and the chimney. Condensation can be a problem in saunas, so ensure adequate ventilation to remove excess moisture. Proper insulation and a vapor barrier will not only improve the sauna’s efficiency but also protect the structure from rot and decay.
Smart Material Choices for Longevity
Building a sauna is an investment, and choosing durable, long-lasting materials is key to protecting that investment. Naturally rot-resistant woods like cedar and redwood are excellent choices for exterior siding and interior paneling. While more expensive upfront, they'll save you money in the long run by resisting decay and requiring less maintenance.
Stainless steel fasteners are essential for preventing corrosion, especially in a moist environment like a sauna. Avoid using galvanized steel, as it can rust over time. When selecting a roofing material, consider durability and weather resistance. Metal roofing is a long-lasting option, but asphalt shingles are more affordable. Proper drainage is crucial to prevent water damage – ensure the site is well-drained and the roof is properly sealed.
Prioritizing sustainable and environmentally friendly materials is a responsible choice. Look for lumber certified by the Forest Stewardship Council (FSC), which ensures it comes from responsibly managed forests. Consider using recycled materials whenever possible. A well-built sauna, using quality materials, can provide years of enjoyment and relaxation.

No comments yet. Be the first to share your thoughts!