
Dreaming of a Backyard Sauna?
There's something deeply satisfying about the ritual of a sauna. The heat easing your muscles, the quiet solitude, the feeling of complete relaxation – it’s an experience that’s been cherished for centuries. Beyond the immediate comfort, regular sauna use has been linked to improved cardiovascular health, reduced stress, and even boosted immunity. It's not just about feeling good; it's about investing in your wellbeing.
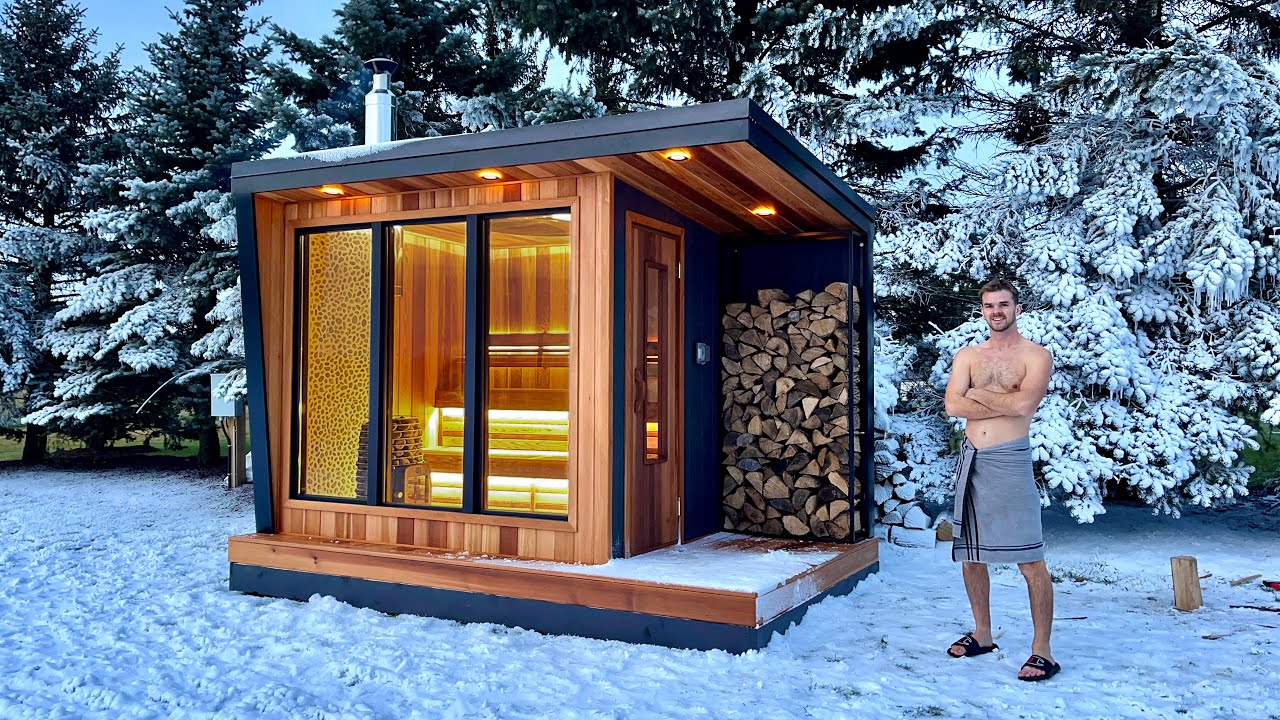
And increasingly, people are bringing that experience home. An outdoor sauna is more than just a luxury; it’s a sanctuary, a place to reconnect with yourself and with loved ones. Imagine crisp winter evenings spent in the warm embrace of your own sauna, or summer afternoons followed by a refreshing plunge. It sounds idyllic, doesn’t it?
Building your own sauna might seem daunting, but it’s surprisingly achievable. With careful planning and a bit of elbow grease, you can create a beautiful and functional backyard retreat. It's a project that rewards effort, and the sense of accomplishment is almost as satisfying as the first session in your finished sauna. This guide will walk you through the process, making the dream of a backyard sauna a reality.

Planning & Permits: Before You Build
Before you even think about laying a foundation, thorough planning is essential. This isn’t just about design; it’s about ensuring your build is legal and safe. Start by checking your local building codes. Requirements vary widely, so contacting your city or county building department is the first step. They can tell you what permits are needed for a structure like a sauna.
Finding this information can often be done online, but don’t rely solely on websites. A direct phone call ensures you have the most up-to-date and accurate details. The International Code Council (ICC) website () is a good resource for understanding building code principles, though local regulations always take precedence.
Property lines are also crucial. You’ll need to ensure your sauna doesn’t encroach on neighboring properties. A survey might be necessary to confirm your boundaries. Don’t forget to consider utility access. Will you need to run electricity for lighting or an electric heater? Is a water source nearby for filling a bucket for löyly (the steam created by pouring water over hot rocks)?
If you live in a community with a Homeowners Association (HOA), check their rules and regulations before starting any work. HOAs can have restrictions on building size, location, and even exterior finishes. Ignoring these rules can lead to costly fines and delays. Finally, think about location. Choose a spot with good drainage, some privacy, and convenient access from your house.
- Check local building codes.
- Obtain necessary permits.
- Verify property lines.
- Assess utility access (electricity, water).
- Review HOA rules (if applicable).
Foundation & Framing: Building the Structure
The foundation is the base of everything, so getting it right is critical. You have several options: a concrete pad, a gravel base, or pier blocks. A concrete pad provides the most stable and level surface, but it's also the most expensive and labor-intensive. A gravel base is a more affordable and easier-to-install option, but it requires careful compaction and may settle over time. Pier blocks are a good compromise, offering stability without the cost of a full concrete pad.
Once the foundation is in place, it’s time to frame the walls and roof. Saunafin’s kit rough-in details recommend using 2x4 construction-grade spruce for framing, which is a good starting point. As per Instructables’ framing guide, ensure you use pressure-treated lumber for any wood that will be in direct contact with the ground. This prevents rot and extends the life of your sauna.
Stud spacing is typically 16 or 24 inches on center. Closer spacing provides more structural support, but requires more lumber. Header construction is important for supporting the roof and door openings. Use doubled-up 2x4s or 2x6s for headers, depending on the span. Proper bracing is also essential to ensure the structure is square and stable. A slight slope in the floor will help with drainage.
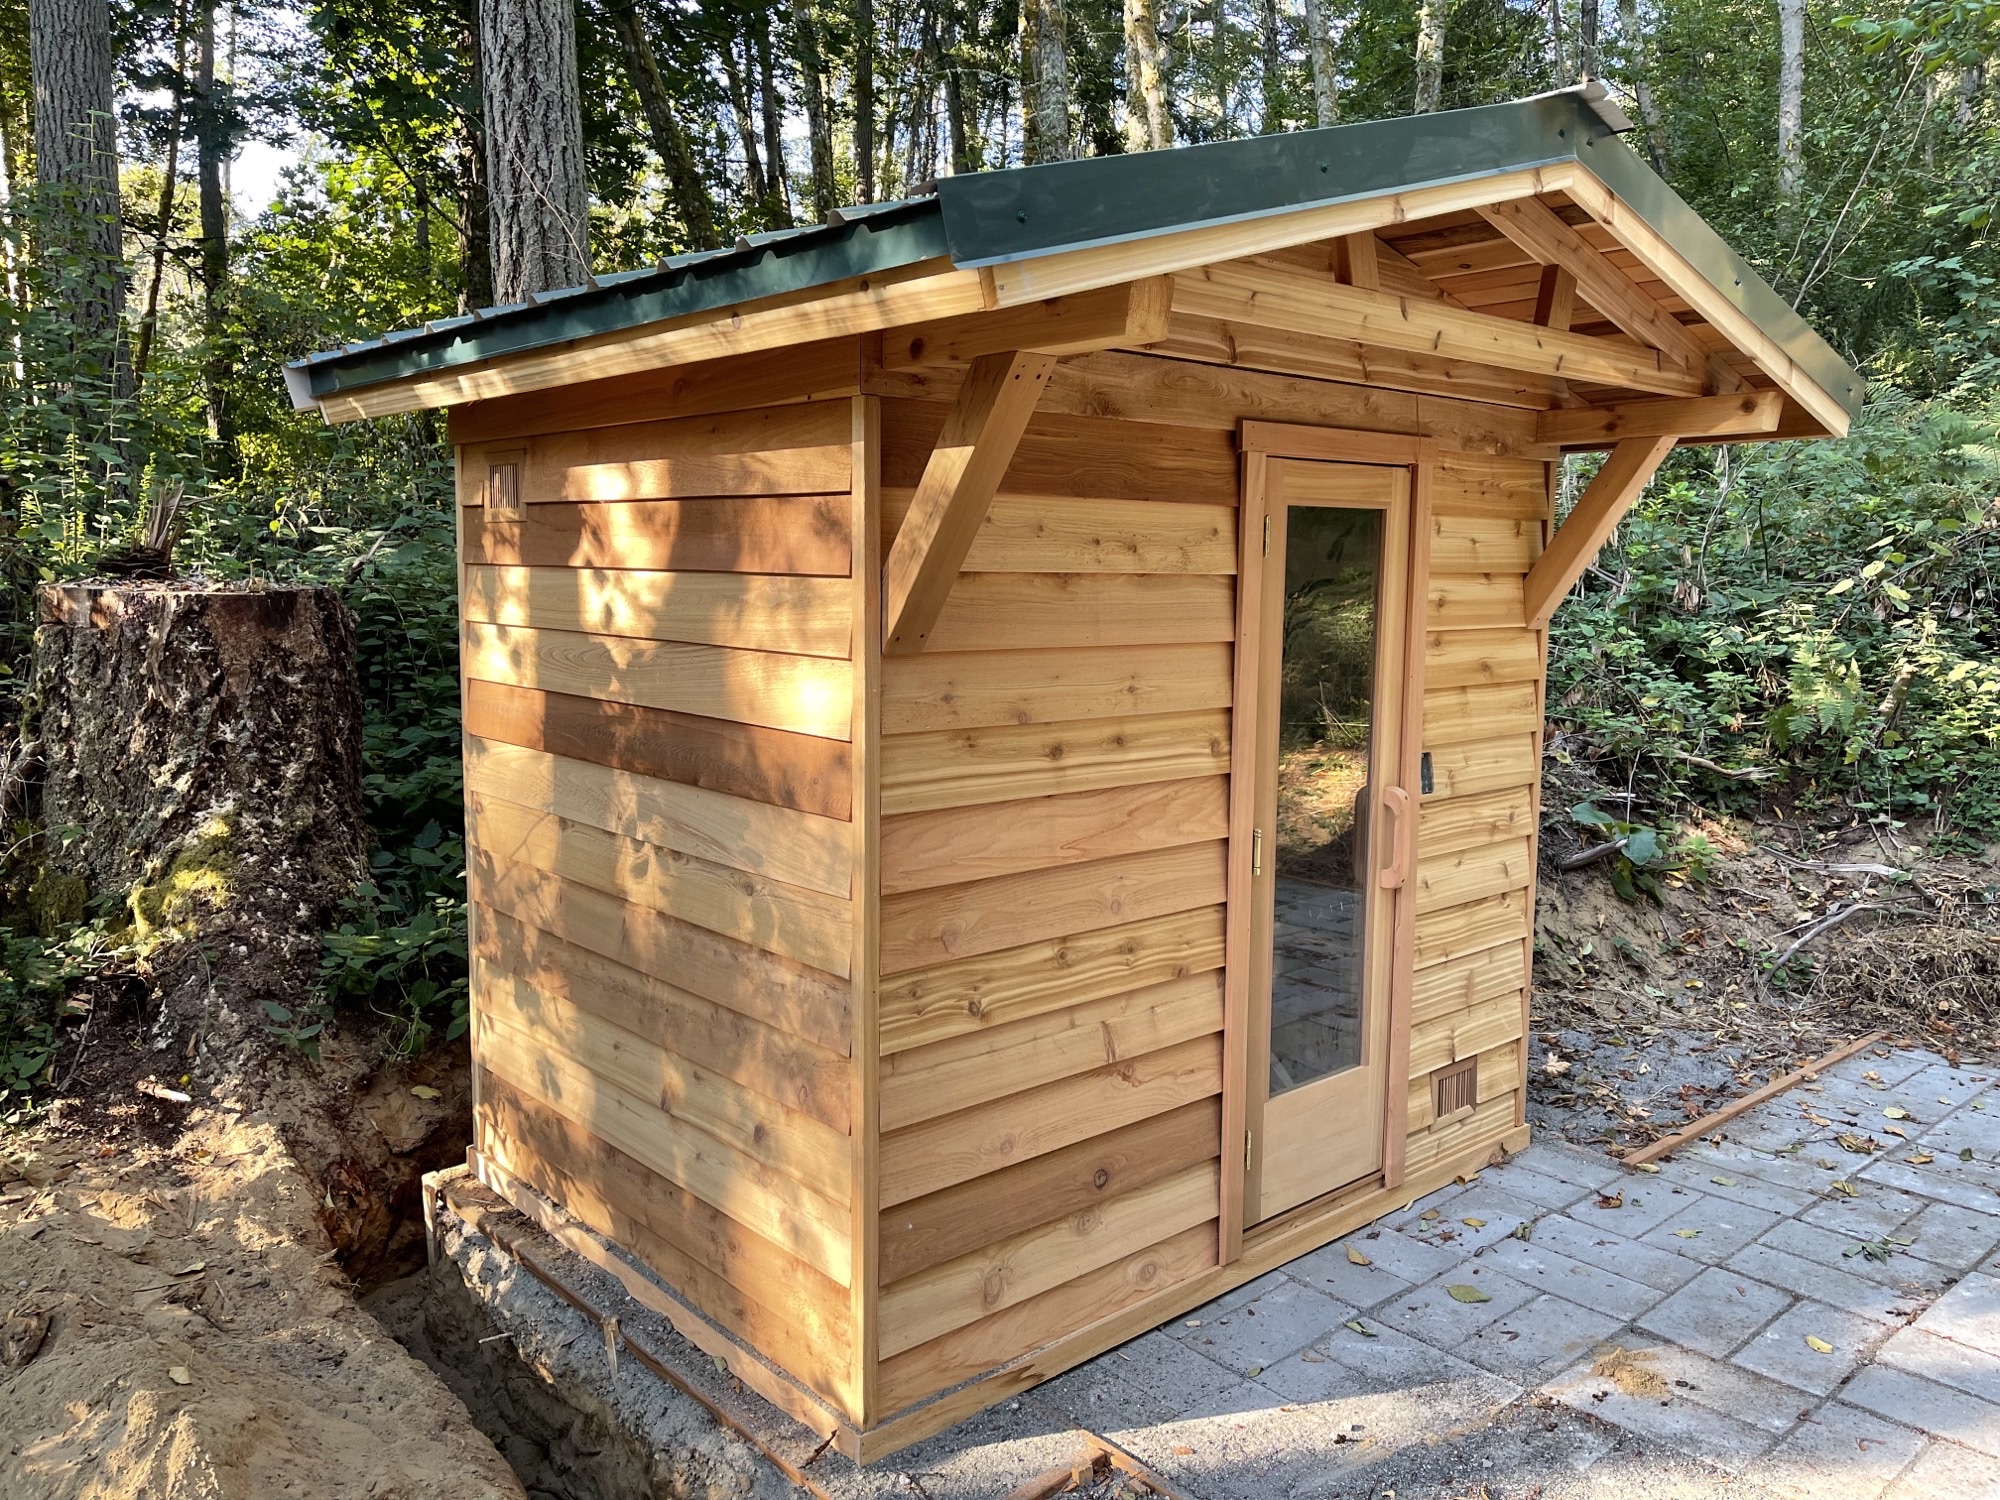
Think about the size and shape of your sauna during the framing stage. An 8x8 foot sauna is a popular size, accommodating 4-6 people comfortably. However, you can customize the dimensions to fit your space and needs. Consider the placement of the door and windows during framing, ensuring they are properly aligned and structurally sound. Remember to account for the weight of the roof when calculating load-bearing requirements.
Siding & Roofing: Weatherproofing Your Retreat
With the frame up, it’s time to protect your sauna from the elements. Siding and roofing are crucial for weather resistance and longevity. Cedar is a popular choice for siding due to its natural resistance to rot and insects, as well as its beautiful appearance. Pine and spruce are more affordable options, but they require regular treatment to prevent decay. Proper installation is key, overlapping the siding boards to shed water effectively.
A vapor barrier is essential to prevent moisture from penetrating the walls and causing mold or mildew. Install a vapor barrier between the siding and the framing before adding interior wall coverings. Roofing options include asphalt shingles, metal roofing, and wood shakes. Metal roofing is durable and long-lasting, but it can be more expensive than shingles. Wood shakes offer a rustic look, but they require more maintenance.
Pay close attention to flashing around windows and doors to prevent water leaks. Caulking and sealing all seams and gaps will further enhance weatherproofing. The type of siding and roofing you choose will also affect the overall aesthetic of your sauna. Consider the style of your house and the surrounding landscape when making your selections. A well-built and properly weatherproofed sauna will provide years of enjoyment.
Don't underestimate the importance of proper ventilation under the siding. This allows for air circulation and helps to prevent moisture buildup. Leaving a small gap between the siding and the framing can improve ventilation. Also, ensure any windows or doors are installed with proper weather stripping to prevent drafts and water infiltration.
- Install a vapor barrier between siding and framing.
- Overlap siding boards for effective water shedding.
- Use flashing around windows and doors.
- Caulk and seal all seams and gaps.
The Heart of the Sauna: Heater Selection
The heater is the soul of the sauna, providing the heat that transforms it into a relaxing oasis. You have three main options: wood-fired, electric, and infrared. Wood-fired heaters offer a traditional sauna experience, with the crackling of the fire and the aroma of burning wood. They require a chimney and a source of firewood, and they typically take longer to heat up than electric heaters.
Electric heaters are convenient and easy to use. They plug into a standard electrical outlet (though a dedicated circuit is often recommended) and heat up quickly. However, they don’t offer the same authentic sauna experience as a wood-fired heater. Infrared heaters are a newer option that heats the body directly, rather than heating the air. They are energy-efficient and offer a milder heat.
BTU requirements depend on the size of your sauna. A general rule of thumb is 40-50 BTU per cubic foot. TheSaunaHeater specializes in wood-fired options, and their website provides guidance on sizing. Electric heaters require a dedicated circuit, and the amperage will vary depending on the heater’s wattage. Always consult a qualified electrician for electrical work.
Safety is paramount when choosing a heater. Look for heaters with thermal cutoffs to prevent overheating. Wood-fired heaters require proper venting to prevent carbon monoxide buildup. Electric heaters should be grounded properly to prevent electrical shock. Consider the long-term operating costs of each heater type. Wood-fired heaters require a constant supply of firewood, while electric heaters consume electricity.
- Wood-fired: Traditional, requires chimney and firewood.
- Electric: Convenient, heats up quickly.
- Infrared: Energy-efficient, milder heat.
Sauna Heater Comparison
| Heater Type | Cost | Installation Difficulty | Heating Speed | Maintenance | Atmosphere |
|---|---|---|---|---|---|
| Wood-Fired | Generally Lower Initial Cost | More Complex - Requires Chimney & Proper Ventilation | Slower - Requires Fuel Management | Regular Ash Removal & Chimney Sweeping | Traditional, Authentic Sauna Experience |
| Electric | Moderate Initial Cost | Simpler - Requires Electrical Connection | Faster - Consistent Heat Output | Minimal - Occasional Inspection | Clean, Consistent Heat |
| Infrared | Moderate to Higher Initial Cost | Easiest - Typically Plug-and-Play | Fast - Direct Heating of Body | Very Minimal | Gentle, Dry Heat - Different Feel than Traditional |
| Wood-Fired | Fuel Costs Ongoing | Requires Space for Wood Storage | Dependent on Wood Quality & Availability | Potential for Creosote Build-up | Rustic, Natural Aroma |
| Electric | Electricity Usage Impacts Running Cost | Requires Dedicated Circuit & Proper Wiring | Precise Temperature Control | Long Lifespan with Proper Use | Modern, Convenient Operation |
| Infrared | Electricity Usage Impacts Running Cost | Placement Considerations for Effective Coverage | Direct Heat - May Feel Less Intense | Bulb Replacement (depending on type) | Good for those sensitive to high temperatures |
Qualitative comparison based on the article research brief. Confirm current product details in the official docs before making implementation choices.
Interior Finishing: Benches, Walls & More
Now comes the fun part: creating a comfortable and inviting interior. Benches are the most important element, providing a place to sit and relax. Build benches using softwoods like cedar or basswood. Multiple levels of benches allow for different temperature zones – higher benches are hotter, while lower benches are cooler. Ensure the benches are sturdy and can support the weight of multiple people.
For interior walls, cedar is again an excellent choice due to its aroma, durability, and resistance to moisture. Basswood is a more affordable alternative. Avoid using treated lumber inside the sauna, as it can release harmful chemicals when heated. Proper ventilation is crucial for air circulation. Install vents near the floor and ceiling to allow for fresh air to enter and stale air to exit.
Lighting should be low-heat LEDs to avoid overheating and creating a fire hazard. Avoid using traditional incandescent bulbs. Accessories like buckets, ladles, and thermometers add to the sauna experience. A bucket and ladle are used to pour water over the hot rocks, creating löyly. A thermometer helps you monitor the temperature.
Consider the overall aesthetic of the interior. A natural wood finish creates a warm and inviting atmosphere. You can also add personal touches, such as artwork or plants. Remember to prioritize comfort and functionality when designing the interior of your sauna. A well-designed interior will enhance your sauna experience.
Safety First: Ventilation & Electrical
Safety should be your top priority throughout the entire build process, and especially when it comes to ventilation and electrical work. Proper ventilation is critical to prevent carbon monoxide buildup, particularly with wood-fired heaters. Ensure the chimney is properly installed and maintained. Install carbon monoxide detectors inside the sauna and in the surrounding area.
Electrical safety is equally important. All electrical work should be performed by a qualified electrician and must comply with local electrical codes. Use GFCI (Ground Fault Circuit Interrupter) protection for all circuits serving the sauna. Ground the heater properly to prevent electrical shock. Never run electrical cords under rugs or carpets.
Overheating is a serious hazard. Ensure the heater has a thermal cutoff switch to prevent it from overheating. Never leave the sauna unattended while the heater is on. Be mindful of the temperature and avoid staying in the sauna for extended periods. Listen to your body and take breaks when needed. A well-maintained sauna is a safe sauna.
- Install carbon monoxide detectors.
- Use GFCI protection for all circuits.
- Ground the heater properly.
- Ensure the heater has a thermal cutoff switch.
Enjoying Your Sauna: Tips & Maintenance
Congratulations, your backyard sauna is complete! Now it's time to relax and enjoy the fruits of your labor. Start with shorter sessions (10-15 minutes) and gradually increase the duration as you become more accustomed to the heat. Stay hydrated by drinking plenty of water before, during, and after your sauna session. Avoid alcohol before or during sauna use.
Proper maintenance will ensure your sauna lasts for years to come. Regularly clean the interior with a mild soap and water solution. Treat the exterior wood with a sealant or stain to protect it from the elements. Inspect the heater regularly for any signs of damage. Clean the chimney of a wood-fired heater annually to prevent creosote buildup.
Sauna use has been linked to numerous health benefits, including improved cardiovascular health, reduced stress, and muscle recovery. However, it’s important to consult with your doctor before using a sauna if you have any underlying health conditions. Share your sauna experiences with friends and family, and create lasting memories in your own backyard retreat.
- Stay hydrated.
- Avoid alcohol before or during sauna use.
- Clean the interior regularly.
- Treat exterior wood with sealant or stain.
What is the biggest factor holding you back from building your own DIY outdoor sauna?
We want to hear from our community! Whether you are planning a build or just dreaming about it, let us know what your biggest challenge is. Vote below!
No comments yet. Be the first to share your thoughts!